A great thing about Nanette (amongst other stellar qualities, obviously) is that she is a continual source of inspiration and creativity, whether she believes it or not – a jack queen of all trades. If you haven’t gotten that gist already, then you definitely need to spend more time here. A couple of weeks ago, we were merrily g-chatting to pass the work hours away and started talking about our excitement in anticipation for Coachella. One idea bounced off another and, next thing you know, we have a DIY head chains tutorial. Just your ordinary day… =P
So… happy to share this easy tutorial to make your statement head piece in time for the music festival season!
What you’re going to need:
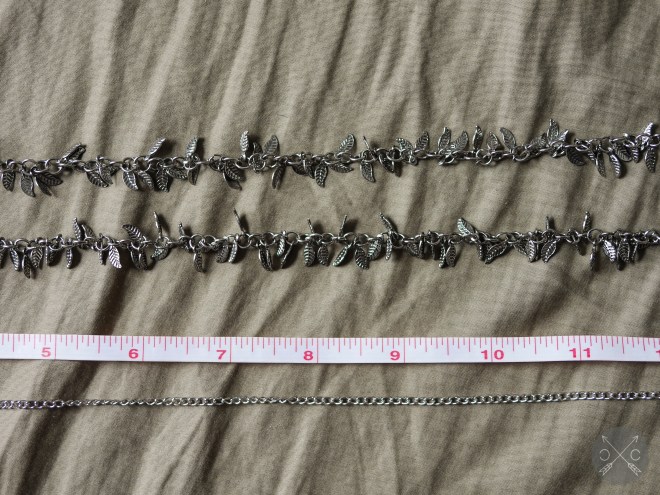
- Chain: I find that the thinner chains look more elegant, but make sure that you do not go too thin since each chain link should still fit through a jump ring. At the bare minimum, get 36 inches of chain to make a simple, one-stranded head chain with some room in case something goes wrong.
- Fringed chain (optional): I found this at Michael’s, but for some reason, I can’t find it on their online site. You can try your luck in-store or try these alternatives: 1, 2, 3, 4
- Tape measure or a ruler
- Jewelry chain nose pliers (also available in a jewelry tool set here)
- Jewelry Cutter (also available in a jewelry tool set here)
- Jump rings
- Charm(s) (optional)
First, measure the length of the chain that will sit in the middle of your head. You can either directly measure this on your head with the tape measure or use the chain itself to measure and place it next to a ruler to get its actual length. For both of my head chains, I used a safe length of 9 in.
Cut the chain at the desired length with the jewelry cutter.
For the outer chain, I recommend measuring out 11 in. for each side. I used the twisty-ties that were included in the packaging to link these three chains and make sure they fit my head before moving forward. Safety pins or thread should also work as alternatives. Add 1 – 1.5 in. to each additional layer of chain. If you’re planning to drape the side chains, I would add an additional 1.5 – 2 in. for each chain
Lay the chains in order of how they will sit on your head from outer chain to middle chain back to outer chain. This is important since this is how the chains will naturally fall into place on top of your head.
Open a jump ring and loop it through the end of each chain. Do the same on the opposite side with a separate jump ring.
Here’s the fun part! If you’re feeling extra creative, you can attach a charm or a tassel comprised of shorter chains to the front or both jump rings before closing it up. Just have fun with it! You can link the center of all the outer chains with another jump ring to create draped chains. The key to creating these drapes is continually linking the chains at the center between two outside links.
Voila! You have your finished product – a fine statement head piece to show off during your music festival shenanigans!
You can also use a charm as another linking point in the front of your head chain.
Adding a tassel at each jump ring is also a quick and easy way to make your head chain pretty!
Special and incredible thanks to my gorgeous friend, Lindsey, for helping me model these head chains! Can someone please tell her that she is beautiful when she smiles?!?! #Sorrynotsorry, I included this photo. =P


Pingback: Travel // Coachella Recap - Cultural Chromatics - Cultural Chromatics
Pingback: How to make hair chain jewelry - Jewelry Directory
Pingback: How to make head chain jewelry - Jewelry Directory